![]()
Documentation, Help and How Tos
Installing maps on an Android tablet using OruxMaps - Magellan TRX/Yamaha Adventure Pro
Need Help? Call or Email: (989)-751-6863 or help@vvmapping.com
The garmin-compatible maps on our card can be used with the free app OruxMaps on Android devices.
This help note covers installing the app from our card and configuring it to use the maps on the same card. The app can also be downloaded from their web site or there is a paid-version on the Play Store. Some versions of Android and/or hardware have trouble installing the app included on our card, in those cases you must install the app from either their web site (free, you want to click the link on their page that says "Current version (7.4.24)") or from the Play store (not free).
The Play Store version has a different set of screens for setup of the Maps Directory setting (included inline below) , it will show on your tablet as "OruxMaps GP" instead of just "OruxMaps".
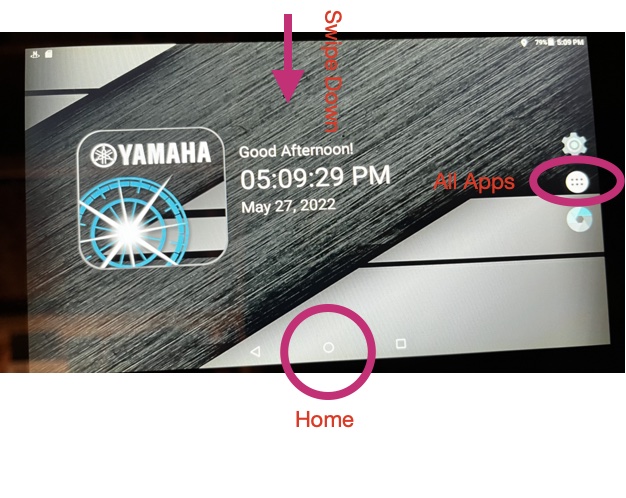
First step is to plug in the card and turn on the tablet. When the unit first boots up, it will normally open the Yamaha/Magellan app, which we need to close and go to the home screen.
Swipe down from the top of the screen to get the navigation buttons at the bottom. Press the Home button (circle) to exit to the home screen. Note this is the Home screen, we've already closed the Yamaha app, in the picture.
Next, tap the All Apps button, the 6 dot button over on the right edge.
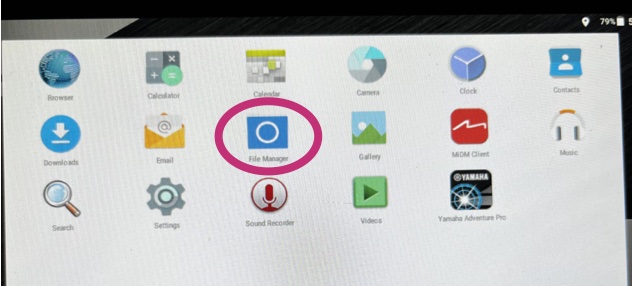
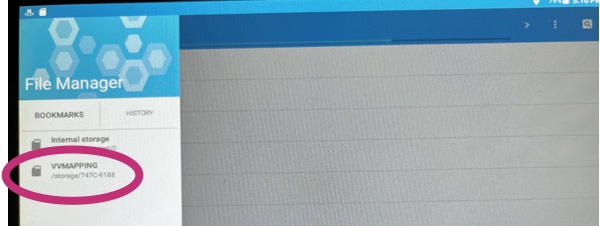
Locate "File Manager" in the All Apps tray and open it.
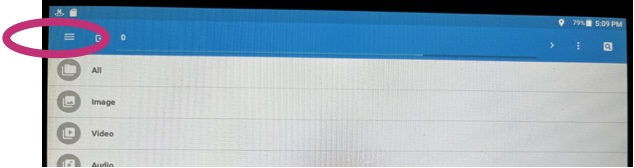
Tap the 3 line button in the top left
Tap on "VVMapping" from the File Manager options.
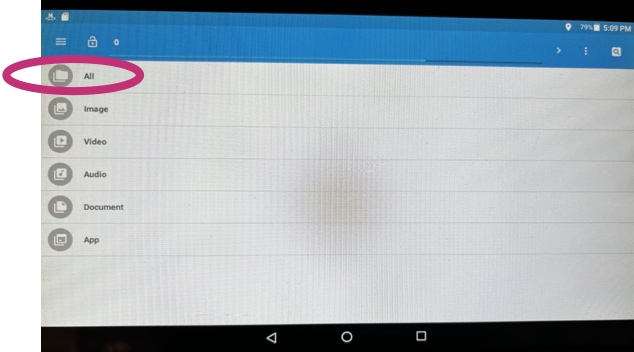
Tap on "All"
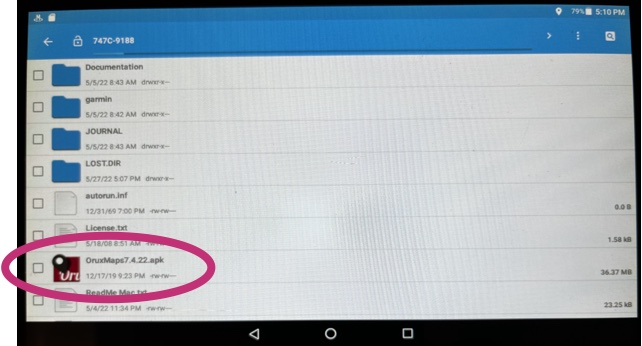
Scroll in the list of items until you see the "OruxMaps7.4.25.apk" item. Tap on it (not the checkbox, but on the icon or name).
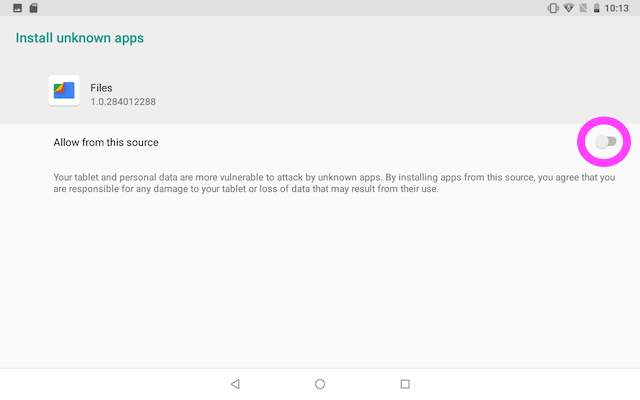
Your device may need the settings changed to allow apps from a memory card to be used. Tap Settings.

Slide the switch to the "on" position, to allow "unknown" apps. Tap the Back button to get back to the Files app. You can disable this setting after installing the app.
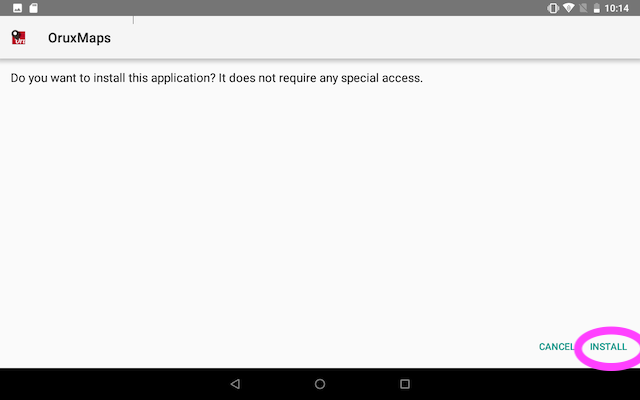
The Files app will now ask if you want to install OruxMaps, tap the Install button.
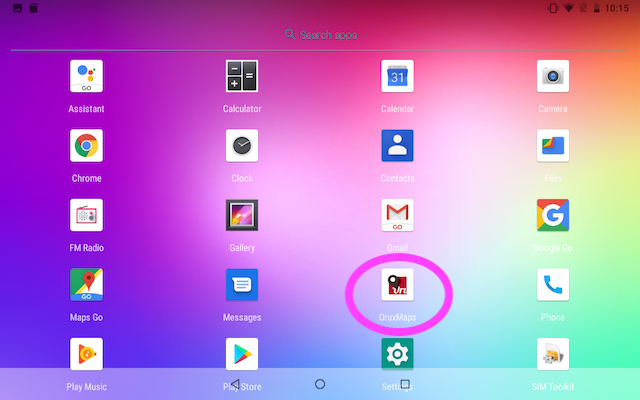
OruxMaps will now be installed and will be in your apps tray. You can press, hold and then drag it out the "desktop" area to put the icon on the main screen for easier access.
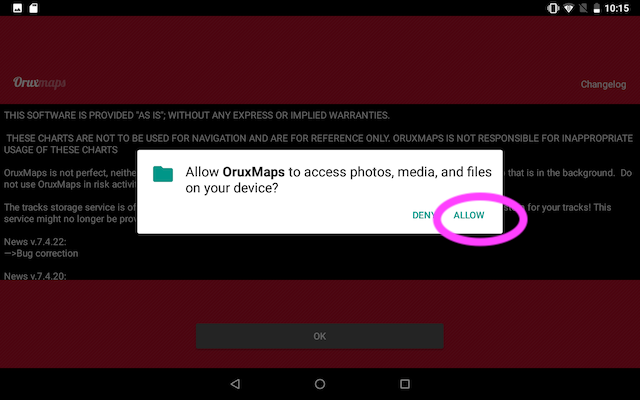
When the app first launches, you'll need to allow it access to your device, so it can access the maps, save settings and get the signal from the GPS.
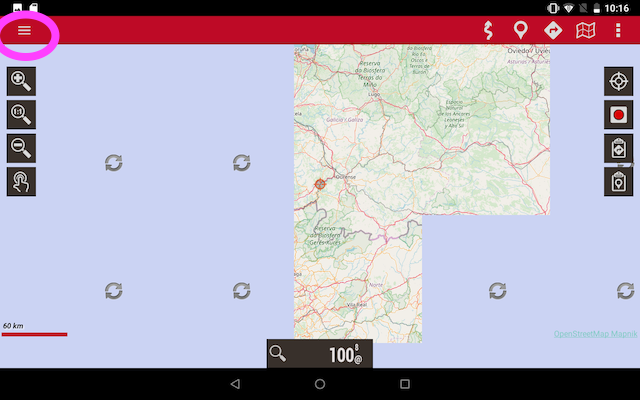
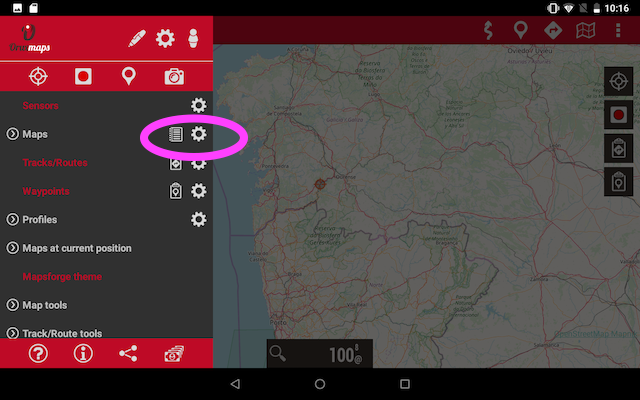
When the app opens, there are several settings that need adjusted. Tap the ||| button in the top left.
Tap the gear icon (settings) to the right of the Maps option.
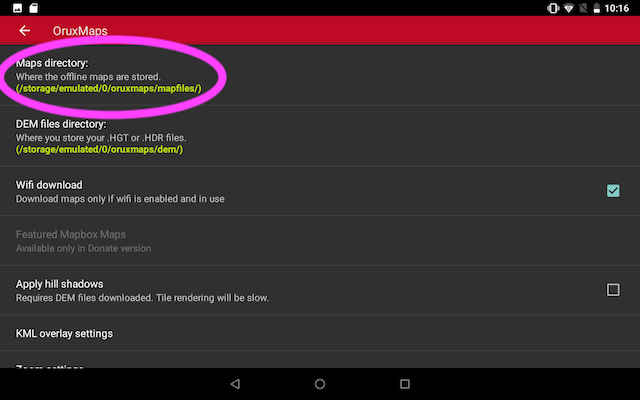
Tap the Maps Directory option. We have to change this to use the "garmin" folder on the memory card.
Tap the memory card icon in the red bar.
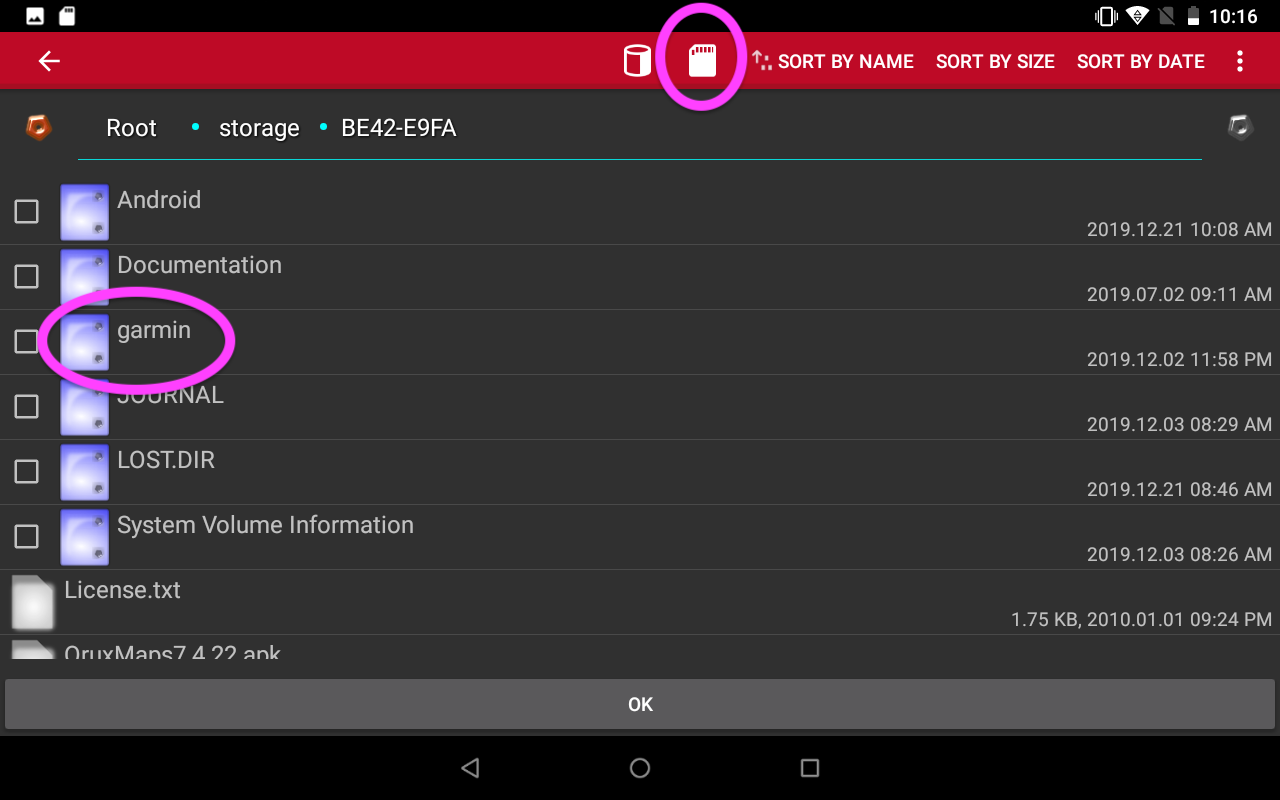
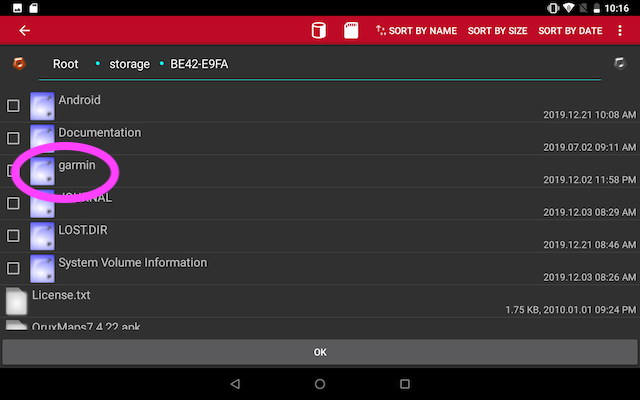
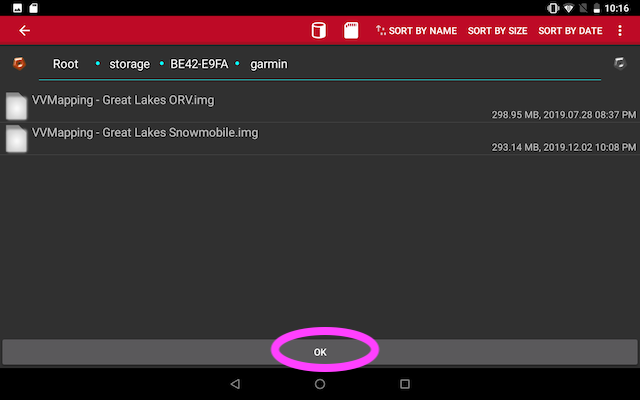
Tap the "garmin" folder to open it. Tap on the word "garmin", not the square or checkbox.
Tap the "OK" button at the bottom to select the Garmin folder.
A message about needing authorization to write to the folder may be presented, tap allow/authorize and on some units another screen will appear where a button or switch is presented to allow access. Varies by model. Hit the back button at the bottom of the screen to return to OruxMaps.
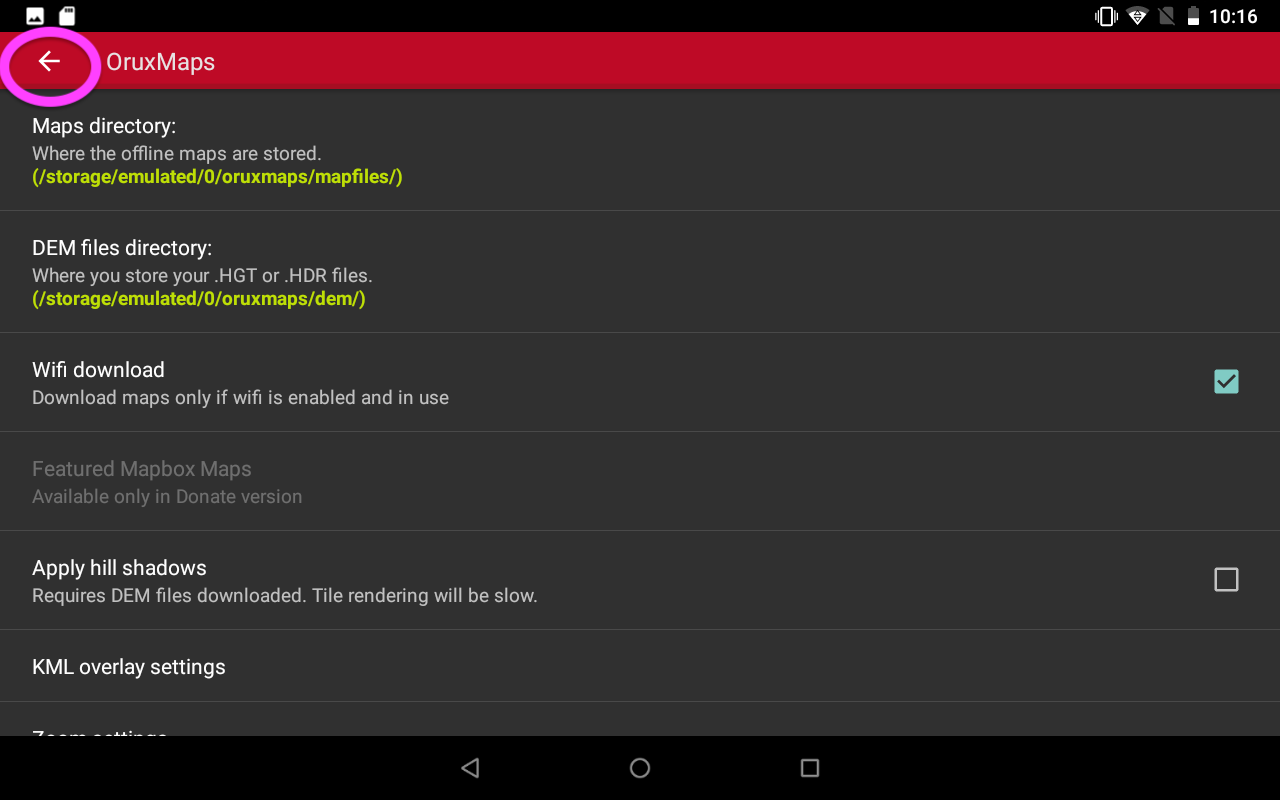
Tap the white back arrow to return to the map screen in Orux.
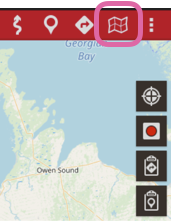
We now need to tell OruxMaps to use our offline map. Tap the Map menu button in the upper right corner then tap on Switch Map.
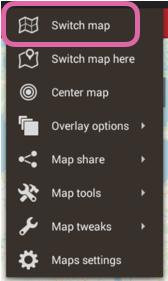
Tap the Offline button in the red bar, then tap the refresh button in the red bar (double arrow), then tap on our map. Our map will be named "gmapsupp" or "VVMapping - Great Lakes ORV" or similar. They will have "(IMG)" also by the name to indicate the map file is a garmin format map.

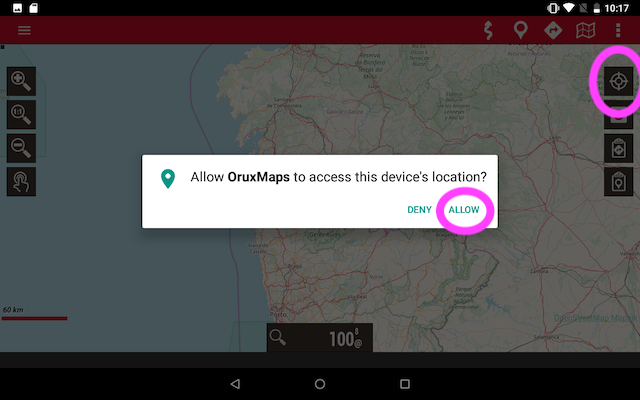
Tap the position icon which tells the unit to get your location from the GPS. Tap the "allow" message to enable OruxMaps to read the device's location.
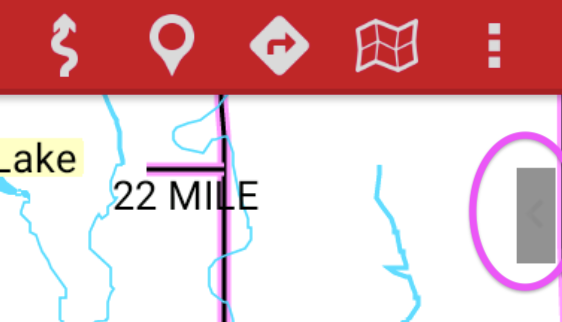
If you do not have the 4 buttons, tap the translucent grey rectangle on the right-hand edge towards the top of the screen.
Once selected, our maps should display on the map screen and it should also show your location. You can drag the map (pan it) to a different area and zoom in, closer in, more detail shows.

To get back into the app, it can be found in your All Apps tray from the home screen.
There are additional settings that we suggest, they are not required.
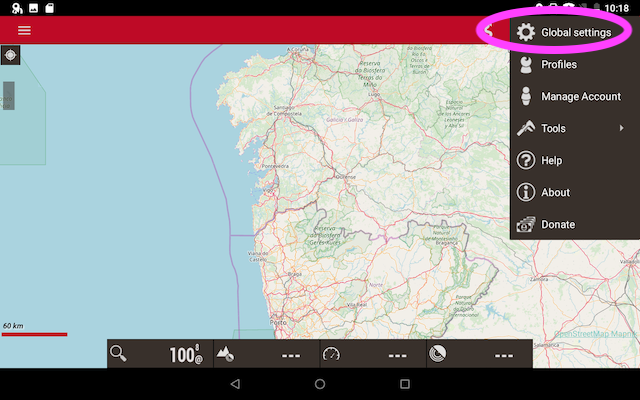
Tap the 3 dot . . . menu in the upper right, then choose Global Settings.
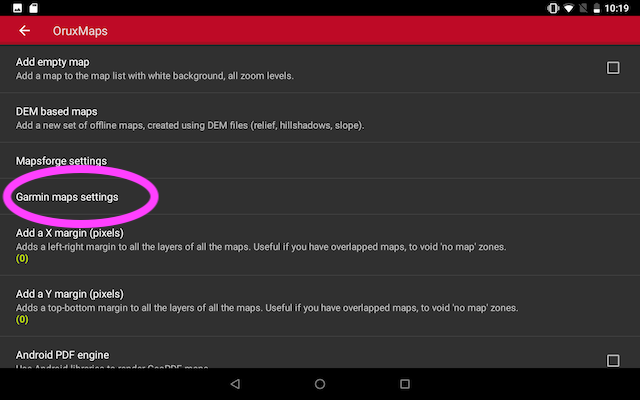
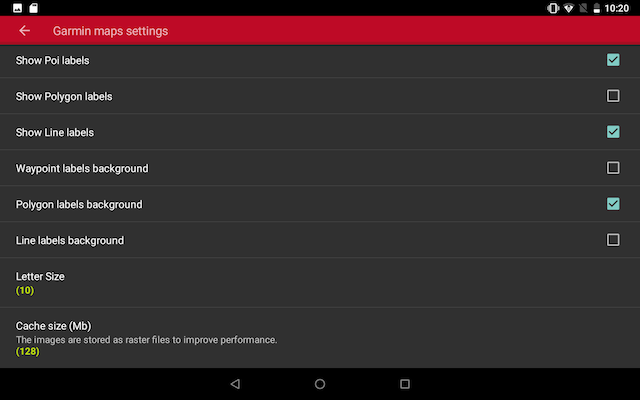
Tap the Garmin Map settings
We suggest setting the label settings as follows. Different selections also work, these generally work better.
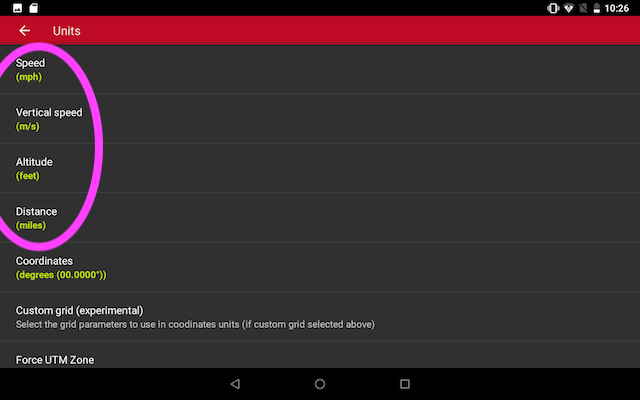
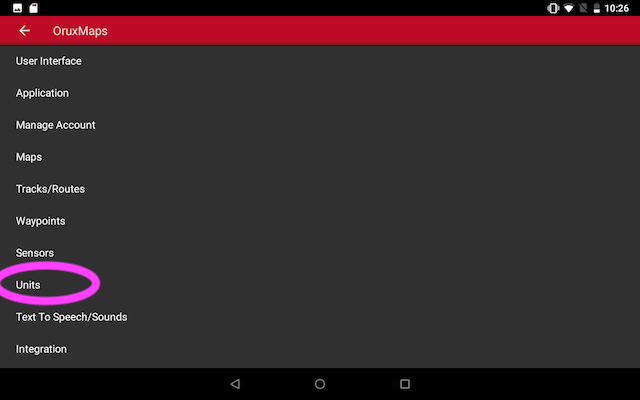
Back up to the Global Settings, then scroll down to the item for Units and tap on it.
We recommend changing the units to US measurements as shown.