![]()
Documentation, Help and How Tos
GPS Settings
Need Help? Call or Email: (989)-751-6863 or help@vvmapping.com
Settings for Routing Features is a topic in itself.
We recommend making the following settings on the GPS for optimal use. What you ultimately determine is your personal preference.
Jump to:
To use our maps once loaded into the GPS, just press the Page button or Map button until you see the Map Screen. Zoom in until you are close enough to see the detail (usually .2 miles out to 1 mile).
Map detail should be set to the highest settings ("Highest", "most", "more' it all depends on the model of GPS). Increasing the detail setting helps to make sure you can see more of the trail and other features at a further-out zoom level.
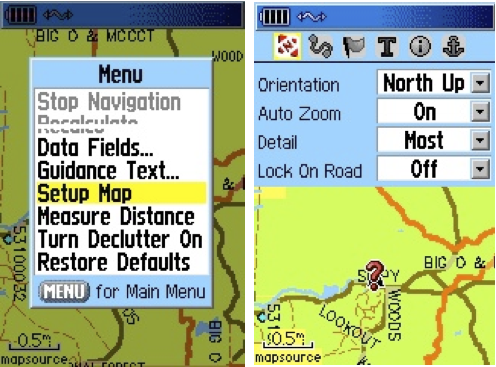
Most Handheld & Combo units (60C, 276C, eTrex): Press the Page button until you are at the Map screen. Press the Menu button. Choose Setup Map. Select the far left menu, then change the Detail setting to "Most", Press Quit to exit.
Press the Wrench icon; Choose Map, Change the Detail level to "Most". Press Back to exit.
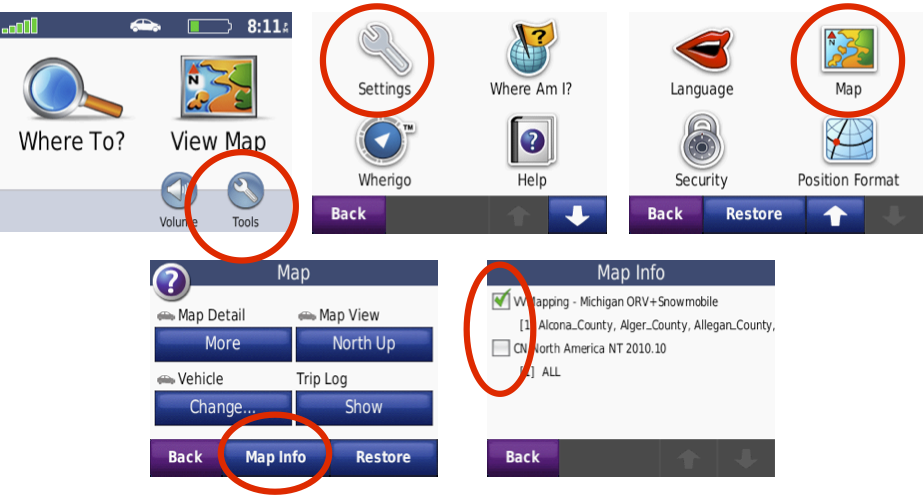
Built-in maps should also be disabled to work with our maps (applies to Nuvi and select other models). To disable the built-in maps, press the "Map Info" button, then uncheck the box next to "City Navigator" and make sure there is a check box next to VVMapping.
Newer Nuvi, Drive and Zumo Map Setup
Main item we need to change is to disable other maps so that only 1 VVMapping map is enabled. The other items are suggestions and will work with what we suggest or your preference.
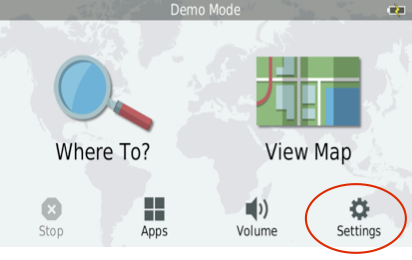
Choose Settings from the main screen.
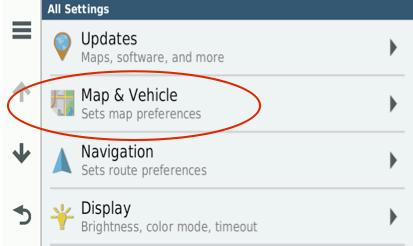
Choose Maps & Vehicle:
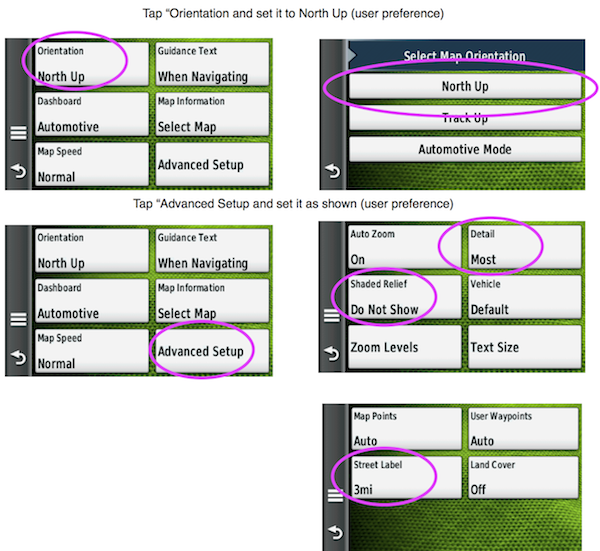
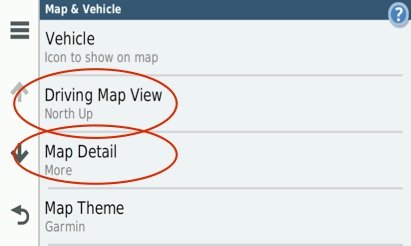
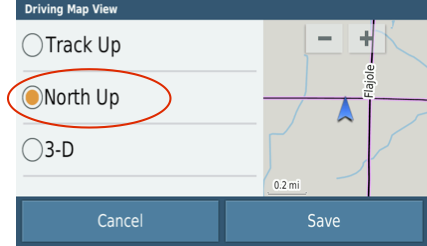
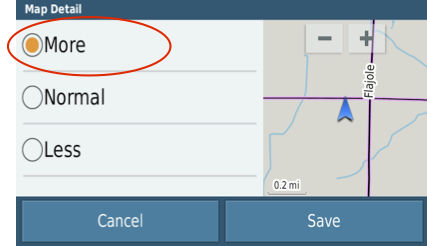
Tap the Driving Map View and set it to North Up; tap Map Detail and set it to More
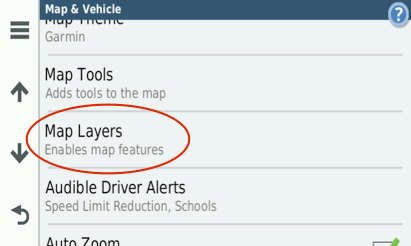
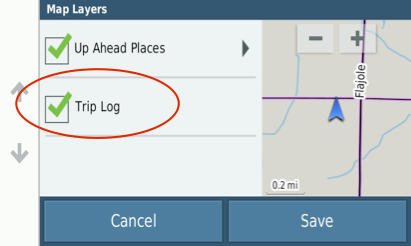
Tap Map Layers and check the box for Trip Log. This will show a bright blue (cyan) line on the map where you've been, aka the bread crumb trail.
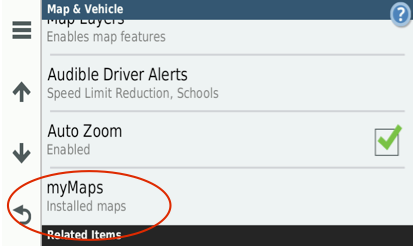
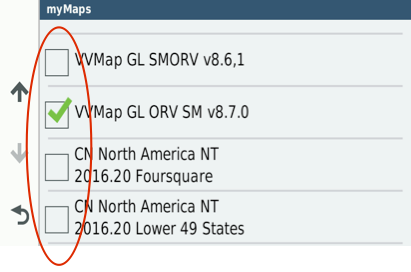
Choose myMaps from the list to turn on/off the maps recognized by the unit.
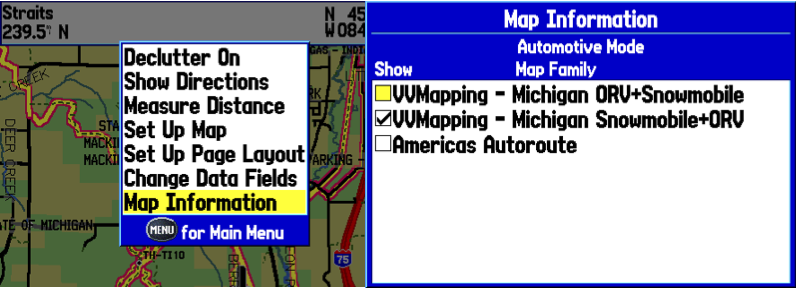
We only want one map enabled at a time. Disable the built-in maps (CN North America are built-in maps). If you have the Snow & ORV combo map from us, be sure to disable one map or the other. Snow & ORV is for snowmobile; ORV & Snow is for ORV use. In the example below, the unit is set to use the ORV maps.
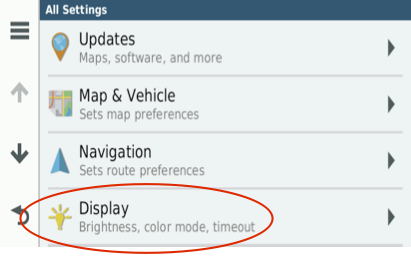
From the main Settings page, hit Display:
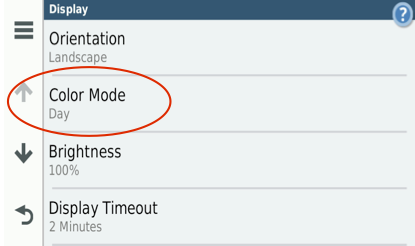
Tap Color Mode and change it from Auto to Day:
Only VVMapping maps should be enabled when they are the ones being used. Disable any non-VVMapping maps. Also disable multiple maps that cover the same area. Our MI Snowmobile & ORV Map s have two maps, only one should be enabled at a time (Snow + ORV is for snowmobiling, ORV + Snow is for ORV use).
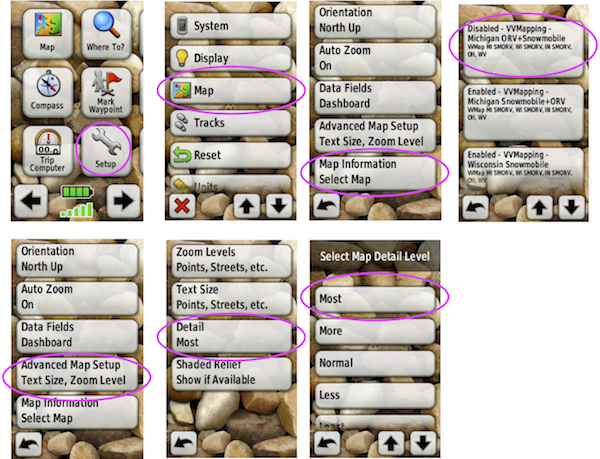
Setup -> Map -> Map Information; touch the map listing to enable/disable it.
It helps to set the detail setting to most so that the fine detail shows up sooner when zooming in.
Setup -> Map -> Advanced Map Setup -> Detail -> Most
Only VVMapping maps should be enabled when they are the ones being used. Disable any non-VVMapping maps. Also disable multiple maps that cover the same area. Our MI Snowmobile & ORV Maps have two maps, only one should be enabled at a time (Snow + ORV is for snowmobiling, ORV + Snow is for ORV use).
Map -> Setup -> Setup Map -> Map Information/Select Map; touch the map listing to enable/disable it.
It helps to set the detail setting to most so that the fine detail shows up sooner when zooming in.
Setup -> Map -> Advanced Map Setup -> Detail -> Most